准备工作
首先确保在你的 Mac 上已安装 Git。
在终端输入命令git --version,能打印出具体的版本号,表示 Git 正确安装。

开始配置
本文以配置 GitHub 和 GitLab 为案例,生成两个公共/私有 rsa 密钥对:rsa_github 和 rsa_gitlab。
创建 rsa 密钥对
进入到当前用户目录
1
cd ~
创建 .ssh 目录
1
mkdir .ssh
如果 .ssh 目录已经存在,则忽略这一步。
进入到 .ssh 目录
1
cd ~/.ssh
生成公共/私有 rsa 密钥对
1
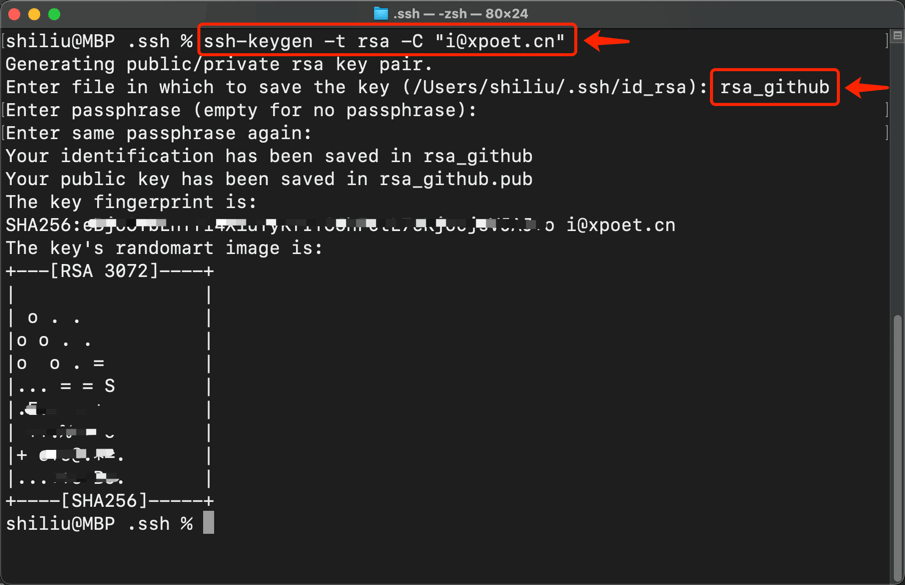
ssh-keygen -t rsa -C "i@xpoet.cn"
此时会看到终端提示输入要保存密钥的文件名,为了做区分,我们给文件名加个后缀,本例第一个 rsa 密钥对:rsa_github。
接着会看到终端提示输入密码,敲两次 Enter 回车键 跳过输入密码。
![image]()
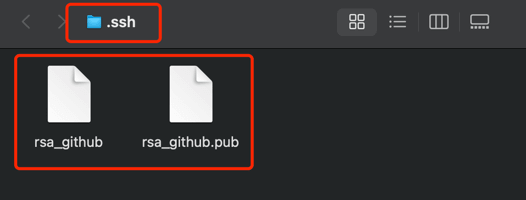
最终会在 .ssh 目录 里生成 rsa_github 和 rsa_github.pub 密钥对。
![image]()
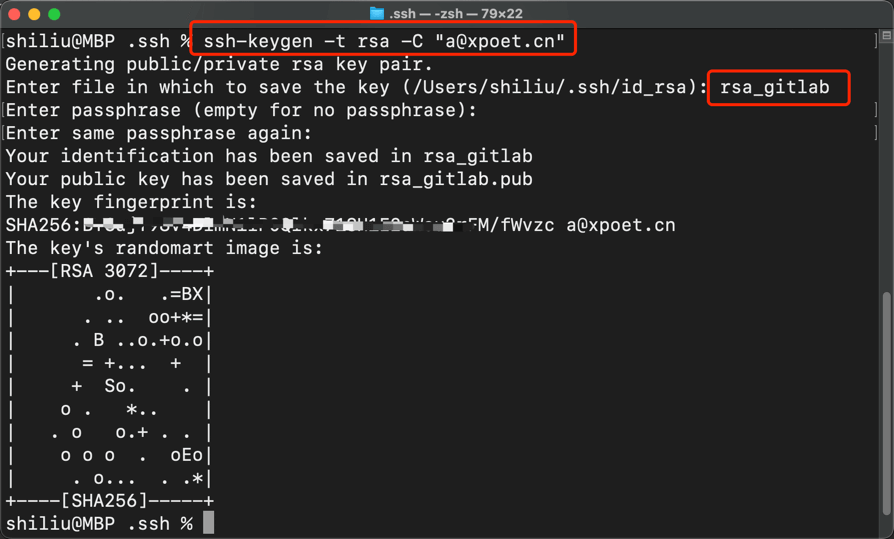
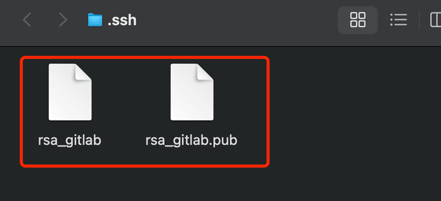
参照第 4 步,创建本例的第二个 rsa 密钥对,rsa_gitlab。
1
ssh-keygen -t rsa -C "a@xpoet.cn"
![image]()
![image]()
配置 rsa 密钥对
进入到 .ssh 目录
1
cd ~/.ssh
创建 config 配置文件
1
touch config
配置 rsa
config 文件创建好之后,将其内容修改为:
1
2
3
4
5
6
7
Host github.com
User XPoet_github
IdentityFile ~/.ssh/rsa_github
Host gitlab.com
User XPoet_gitlab
IdentityFile ~/.ssh/rsa_gitlabUser 填写你的 Git 账号名称
IdentityFile 填写 rsa 路径
配置 Git
进入到用户目录下,创建
.gitconfig文件(Git 的配置文件):1
2cd ~
touch .gitconfig如果
.gitconfig文件已存在,则忽略这一步。在
.gitconfig配置文件追加以下内容:1
2
3
4
5
6[user]
name = XPoet_github
email = i@xpoet.cn
[user]
name = XPoet_gitlab
email = a@xpoet.cn
使用 SSH Key
按照上面步骤,成功创建并且配置 rsa 密钥对,接下来就可以在对应的 Git 平台网站使用 SSH Key,完成和自己 Git 账号的关联。
GitHub
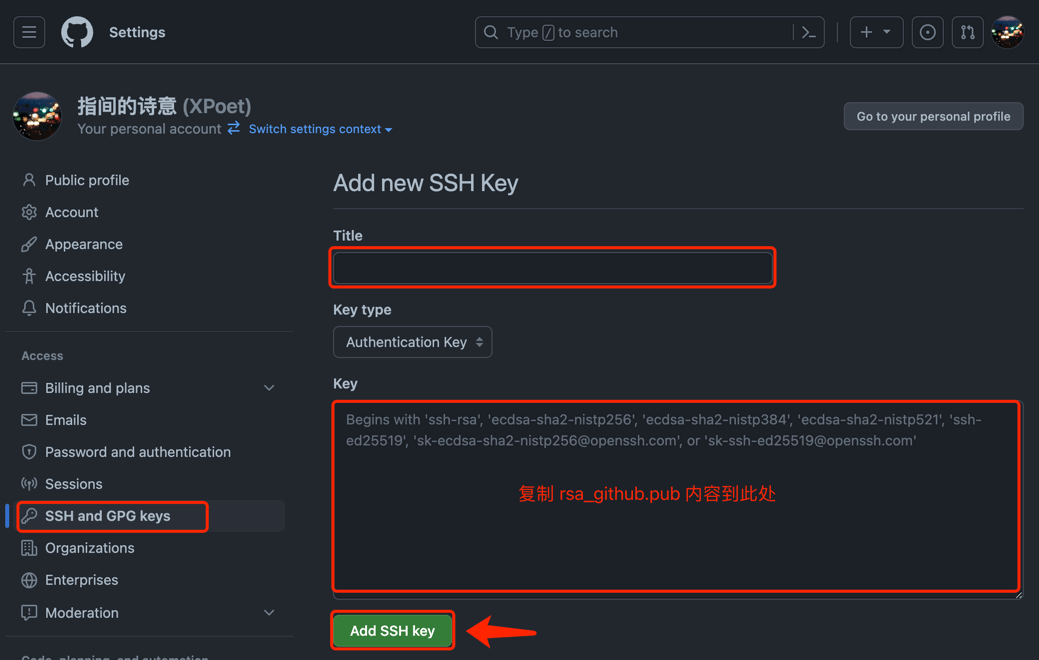
GitHub 添加 SSH Key 流程:
settings --> SSH and GPG keys --> New SSH Key
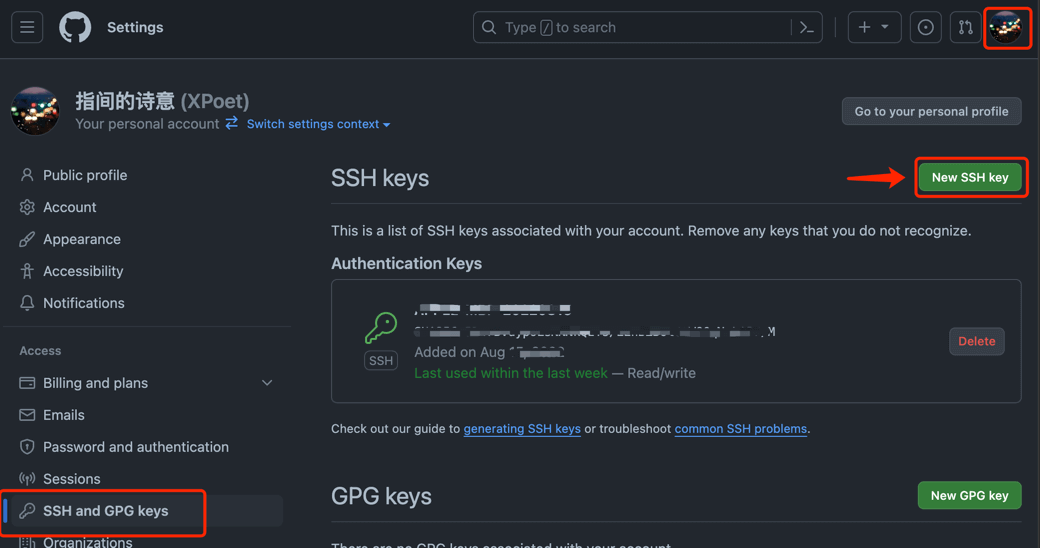
打开 rsa_github.pub,将里面的内容复制到 Key 输入框中。
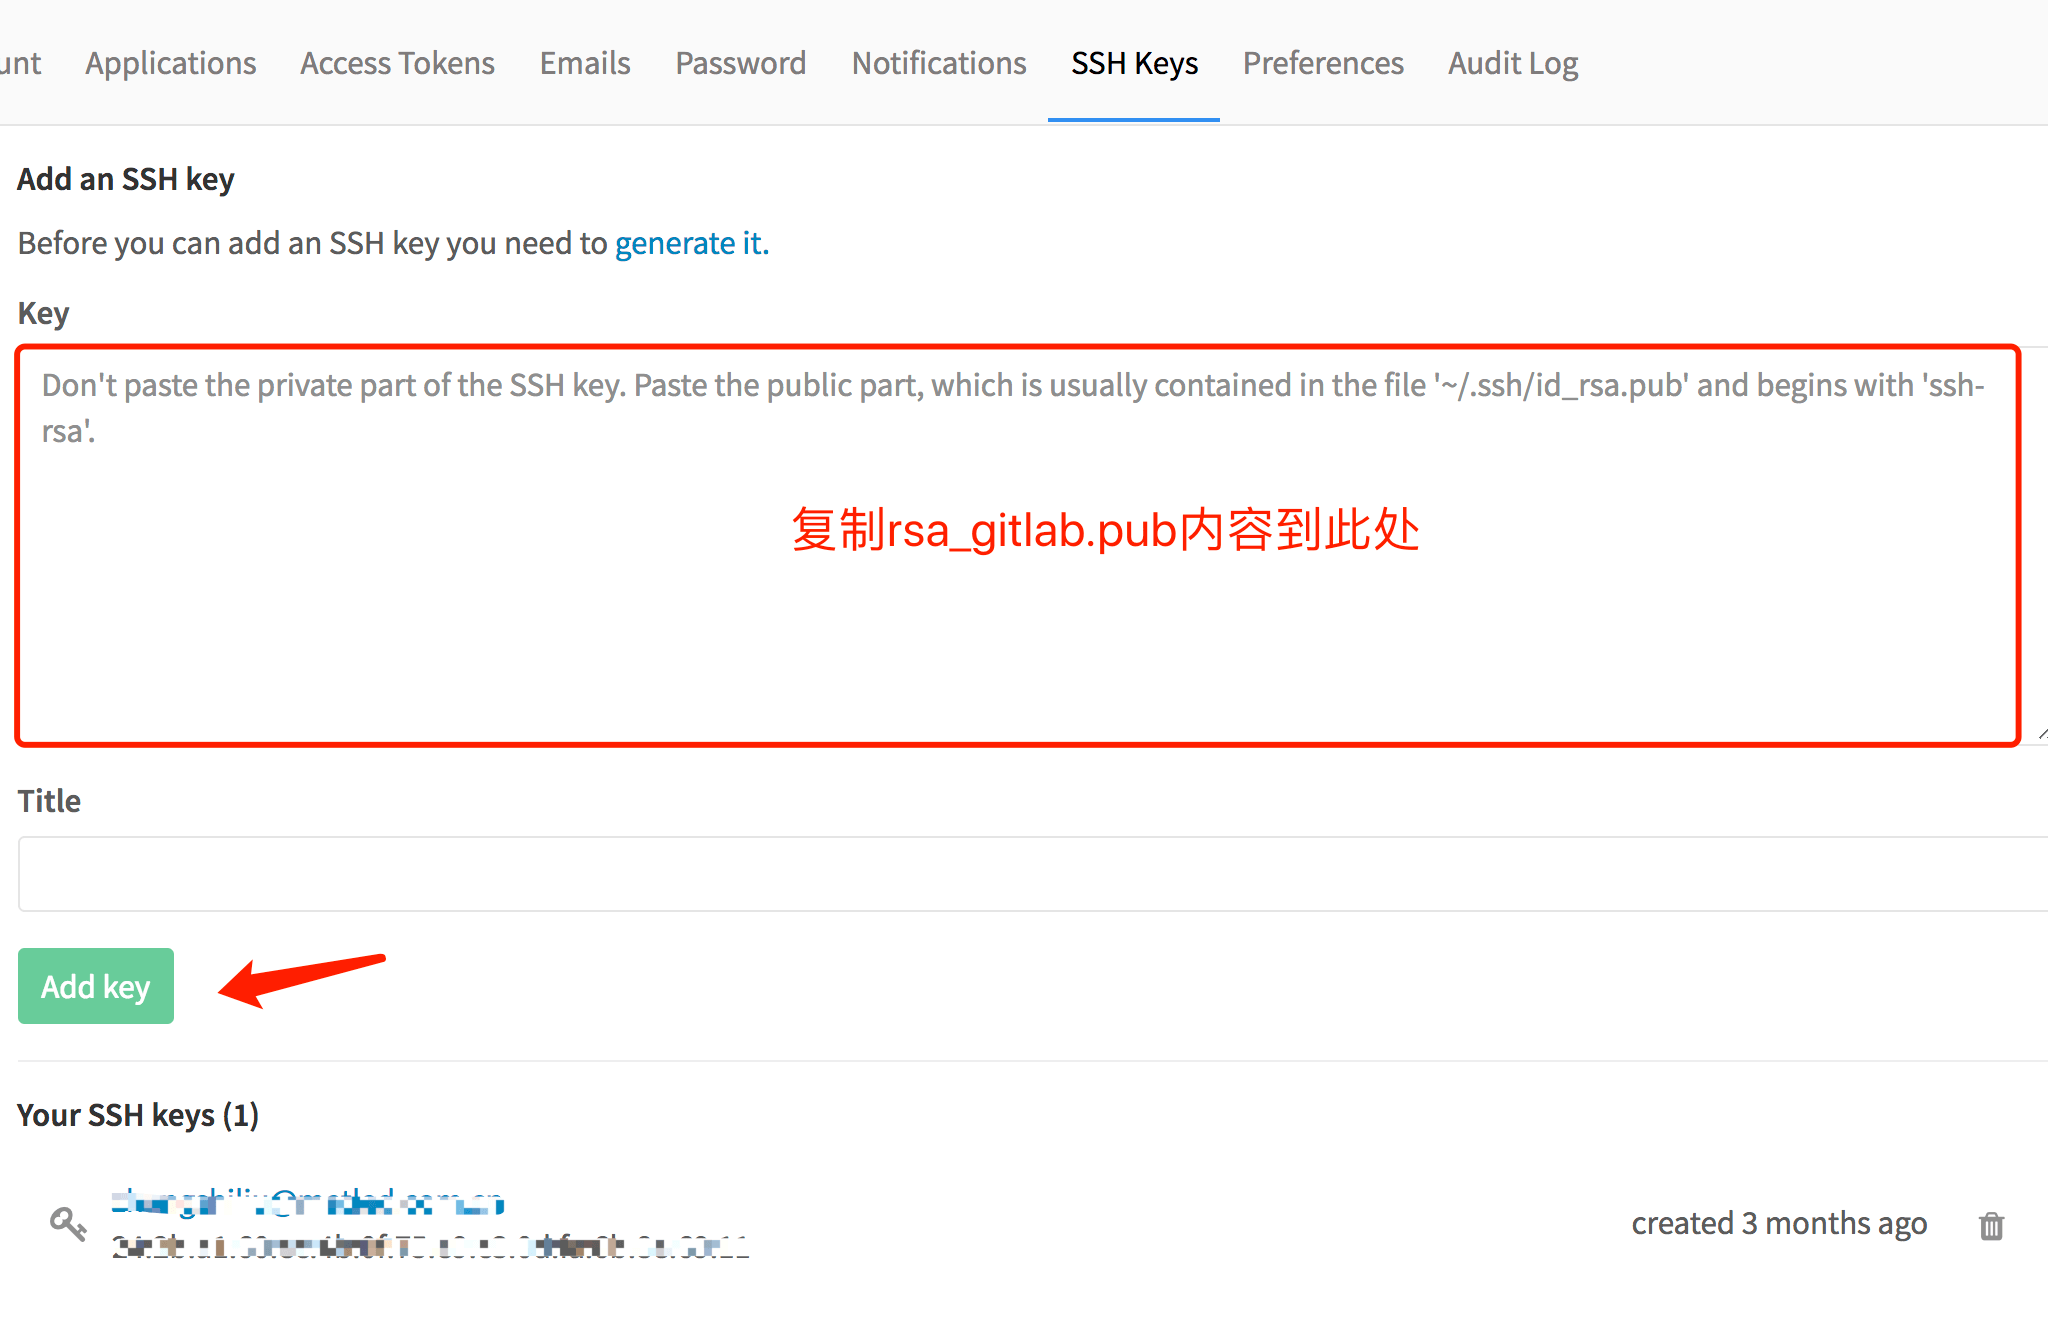
GitLab
GitLab 添加 SSH Key 流程:
Profile --> SSH keys
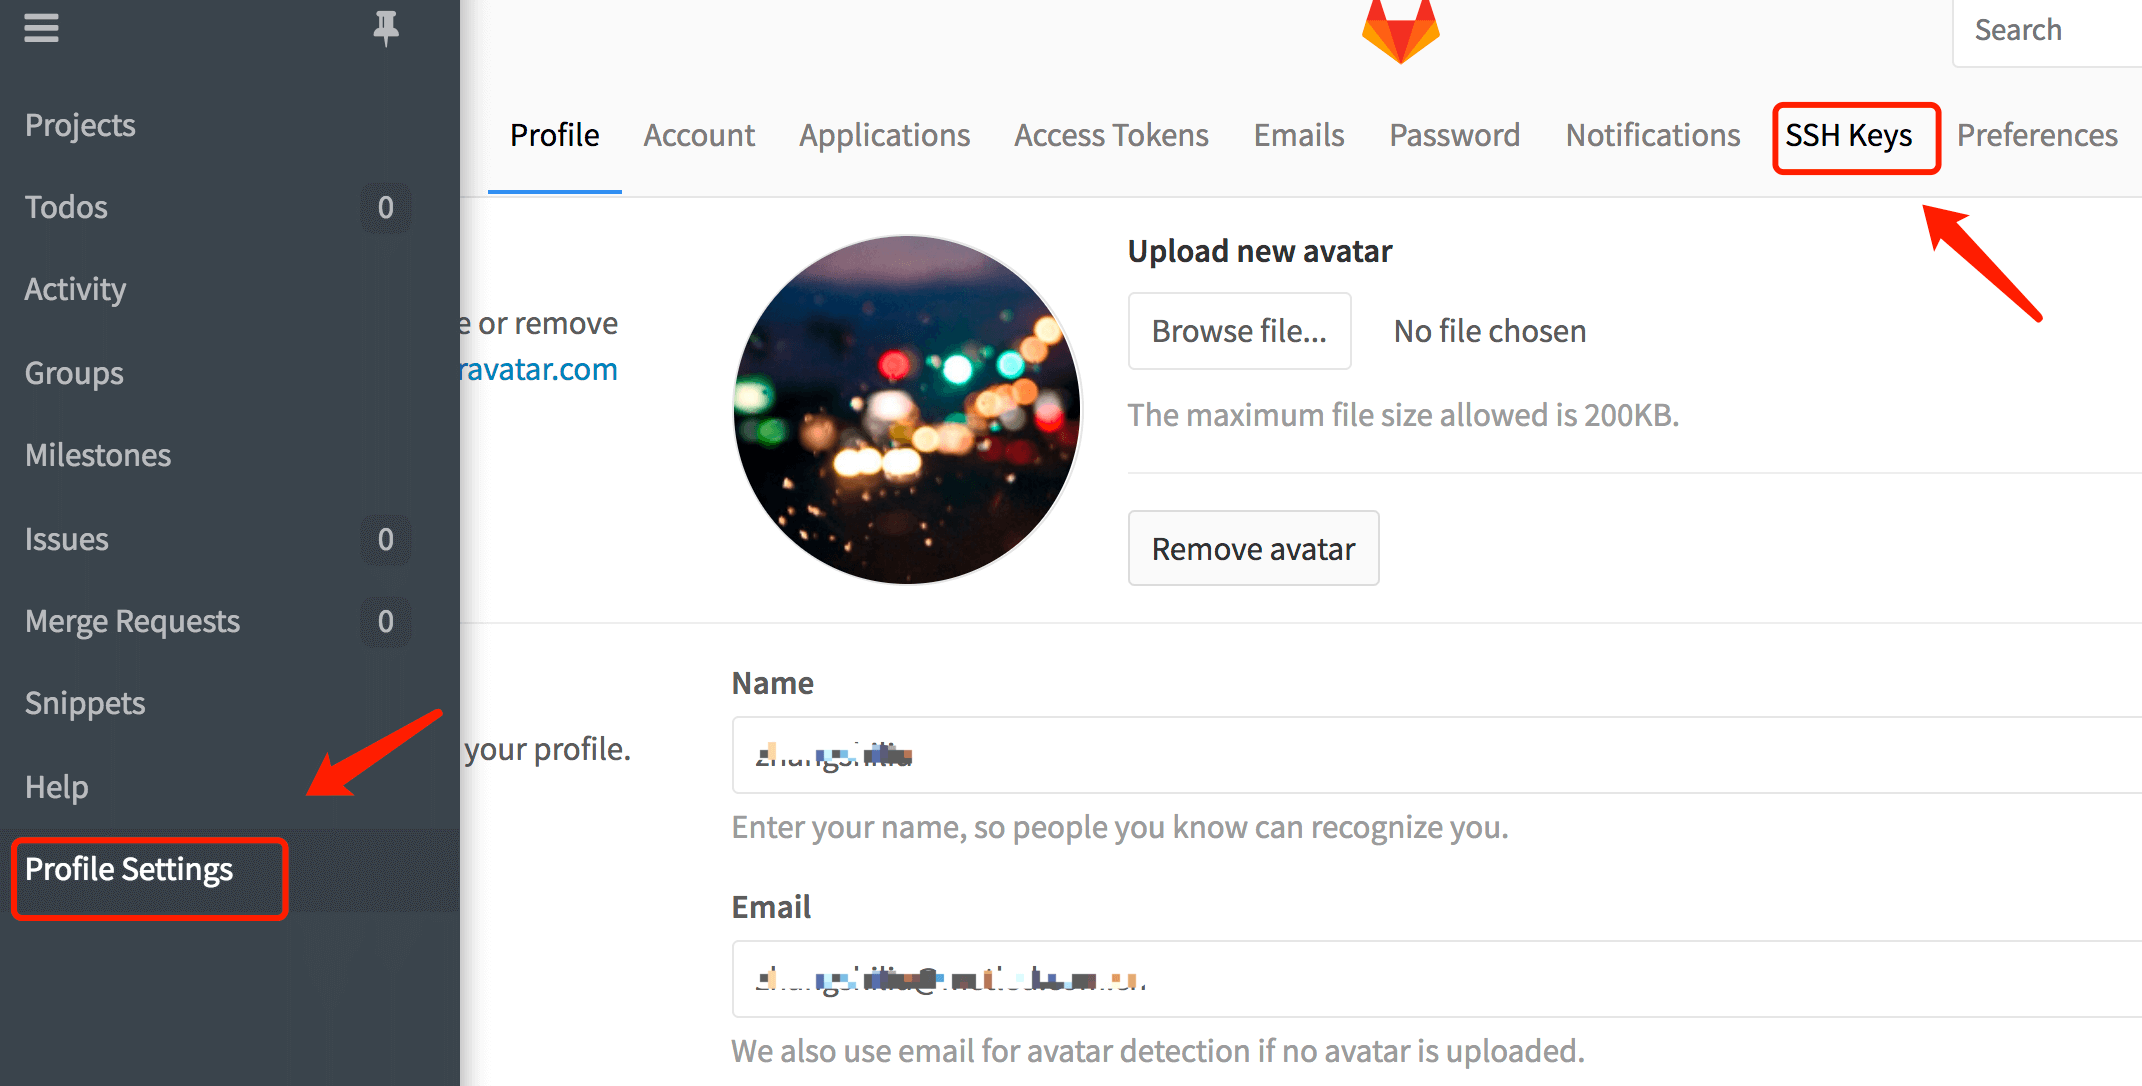
打开 rsa_gitlab.pub,将里面的内容复制到 Key 输入框中。
测试 SSH 连接
以上操作完成后,我们以 GitHub 为例,测试一下 SSH 是否能连接成功。
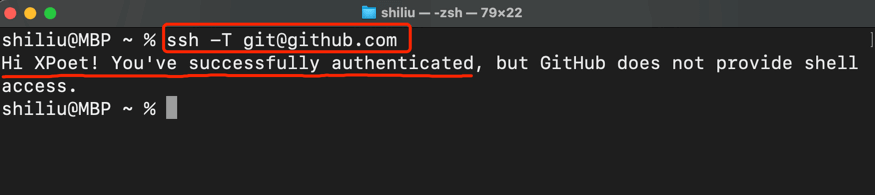
打开终端,输入如下命令,即可测试连接:
1 | ssh -T git@github.com |
如下图,表示 SSH 连接成功。
至此,完成在 macOS 下配置多个 Git 账户的 SSH 连接。同理,我们还可以配置 Coding、Gitee 等。